Table of Contents
Turning kitchen scraps into nutrient-rich soil might sound overwhelming, especially in small spaces. But here’s the truth: composting is simpler than you think. Whether you have a backyard or just a balcony, this eco-friendly habit cuts waste and boosts plant health.
I started with a tiny bin under my sink, skeptical it would work. Fast forward a few months, and my herbs thrived in soil enriched by coffee grounds and eggshells. The best part? My kids loved sorting “greens” (like veggie peels) and “browns” (like dried leaves). It became a fun, hands-on science lesson.
Composting diverts 30% of household waste from landfills, slashing methane emissions. Those banana peels and tea bags? Packed with nitrogen and calcium—perfect for gardens or potted plants. No expert knowledge needed—just balance moisture and materials, and nature handles the rest.
Bonus: Skip pricey store-bought soil enhancers. Your plants (and wallet) will thank you.
Why Composting at Home Is Easier Than You Think
Composting myths often scare beginners, yet the process is as simple as layering scraps. Microbes break down materials naturally—no grinders or chemistry sets needed. Just toss in banana peels, coffee grounds, or dried leaves, and let nature handle the rest.

Urban spaces thrive with compact systems. Apartment dwellers love no-turn tumblers or odor-free bins under the sink. Local pickup services even collect scraps if you’re short on time—like recycling, but for your kitchen waste.
One year of composting saves CO2 equal to a kettle’s annual energy use. Eggshells add calcium; grass clippings boost nitrogen. The result? Healthier soil that fights plant diseases and grows lusher gardens.
Use finished compost everywhere:
- Mix into potting soil for happy houseplants
- Spread thinly over lawns to revive grass
- Donate to community plots if you lack space
Small steps make a big difference. Start with a countertop bin today—your environment (and plants) will thank you.
What to Compost and What to Avoid
Not all kitchen waste belongs in your compost—some items speed up decomposition, while others attract pests. The right materials create a balanced mix of nitrogen and carbon, turning scraps into dark, crumbly gold for your plants.

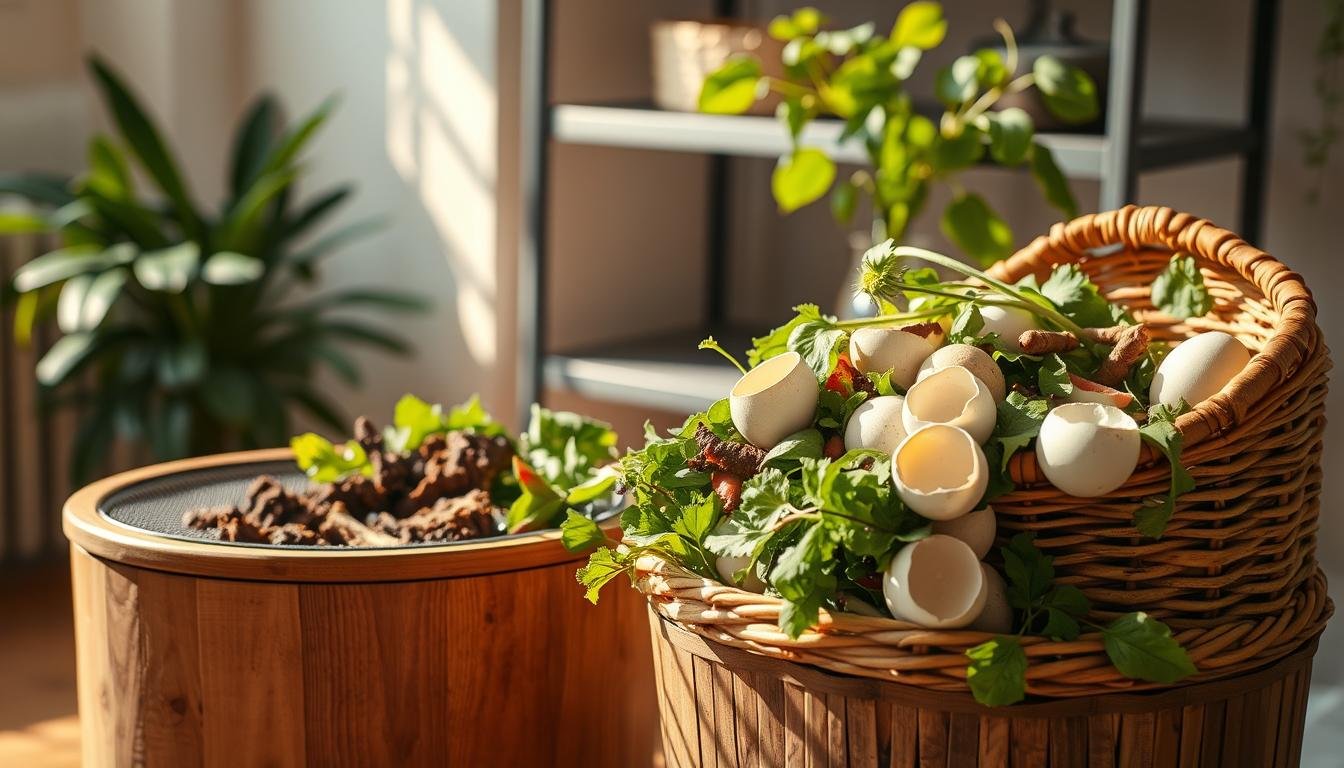
Green Materials (Nitrogen-Rich)
These add moisture and break down fast. Aim for a 1:2 ratio with browns:
- Vegetable scraps: Chop peels for quicker breakdown
- Coffee grounds: Sprinkle thin layers to avoid clumping
- Crushed eggshells: Rinse and crush to boost calcium
- Fresh grass clippings: Mix well to prevent matting
- Tea bags: Remove staples if non-compostable
Brown Materials (Carbon-Rich)
These add bulk and prevent odors. Shred or chop for best results:
- Dried leaves: Crunch into pieces for aeration
- Shredded newspaper: Black-and-white ink only
- Cardboard: Avoid glossy or wax-coated types
- Pine needles: Great for acid-loving plants
- Straw or hay: Ensures airflow in dense piles
| Material | Type | Ratio (Carbon:Nitrogen) |
|---|---|---|
| Coffee grounds | Green | 20:1 |
| Dried leaves | Brown | 60:1 |
| Grass clippings | Green | 15:1 |
Items to Keep Out of Your Bin
Never compost these—they attract rodents or harm microbes:
- Meat/fish: Causes odors (unless using a tumbler)
- Dairy/oils: Slows decomposition
- Diseased plants: Spreads pathogens
- Pet waste: Contains harmful bacteria
Tip: Some city programs accept meat in sealed bins—check local rules!
Setting Up Your Compost System
Finding the right setup for your scraps doesn’t need to be complicated—indoor or outdoor, there’s a perfect fit. Start by assessing your space and daily habits. A tiny kitchen? Try a sleek container. A sunny balcony? A tumbler works wonders.

Choosing an Indoor Container
Odor-proof bins like the Bokashi Bin fit under sinks and handle scraps for 2–3 days. For DIY lovers, repurpose a lidded bucket with drilled holes for airflow. Key features:
- Compact size: 1–2 gallons for weekly emptying
- Charcoal filters: Block smells in tight spaces
- Easy access: Wide mouths for adding materials
Selecting an Outdoor Bin or Tumbler
For yards or patios, tumblers like the Jora JK270 speed up decomposition with easy turning. Stationary bins suit budgets but need manual mixing. Compare options:
| Type | Best For | Price Range |
|---|---|---|
| Tumbler | Fast results, small areas | $100–$300 |
| Wooden Bin | Large yards, DIY-friendly | $50–$150 |
| Metal Bin | Pest resistance | $80–$200 |
Tip: Place outdoor bins on soil to invite worms. Skip meat unless using a sealed compost bin like the Aerobin.
How to Compost at Home: Step-by-Step
The secret lies in balance. A thriving pile mixes greens (like veggie scraps) and browns (like dried leaves) to create the perfect environment for microbes. Too much of one slows the process—think of it as a recipe where proportions matter.

Balancing Greens and Browns
Aim for a 1:2 ratio—one part nitrogen-rich greens to two parts carbon-rich browns. This keeps odors away and speeds decomposition. Example layers:
- Base: Twigs or straw for airflow
- Greens: Coffee grounds, grass clippings
- Browns: Shredded newspaper, cardboard
Pro tip: Chop materials small for faster breakdown.
Maintaining Moisture and Aeration
Your pile should feel like a damp sponge. Too dry? Sprinkle water. Too wet? Add browns. Turn it weekly with a shovel or spin a tumbler to oxygenate. “No-turn” methods work with coarse materials like wood chips.
“A healthy pile smells earthy—like forest soil. If it reeks of ammonia, add more browns.”
Timeline varies: Tumblers finish in 4 weeks; open bins take 3 months. Patience pays off with dark, crumbly compost—your garden’s superfood.
Troubleshooting Common Composting Problems
Even the best composting systems hit snags—but solutions are simpler than you’d guess. A funky smell or uninvited critters doesn’t mean your compost is doomed. With a few tweaks, you’ll get back to rich, crumbly soil in no time.

Odors and Pests
A stinky bin usually means too many nitrogen-rich greens. Balance it out with browns like shredded newspaper or dried leaves. Pro tip: Bury food scraps under grass clippings to deter fruit flies.
For raccoons or rodents, secure lids with bungee cords or use a pest-proof container like the Aerobin. Avoid meat or dairy—they’re pest magnets.
Slow Decomposition
If your pile feels stuck, chop materials smaller. Twigs take months; shredded leaves break down faster. Heat helps—aim for 130–150°F to kill weeds and seeds.
| Issue | Fix |
|---|---|
| Clumped grass | Turn with a pitchfork |
| Cold pile | Add manure or comfrey |
| Weeds surviving | Hot compost or remove |
Warning: Never compost invasive weeds or diseased plants—they’ll spread trouble.
Using Your Finished Compost
Dark, crumbly compost means it’s time to put nature’s recycler to work. This soil superhero boosts plants, fights weeds, and locks in moisture—no chemicals needed.

Add compost to garden beds before planting or sprinkle around existing plants. For pots, mix 1 part compost with 3 parts soil. It’s like a vitamin shot for roots.
Revive tired lawns by spreading a thin layer and raking gently. Too thick? It smothers grass. Pro tip: Water lightly to help nutrients sink in.
Compost Tea: Liquid Gold
Steep a shovel of compost in water for 3 days. Strain and use to water plants. Packed with nitrogen, it’s a fast-acting pick-me-up.
| Use Case | Method | Best Time |
|---|---|---|
| Garden Beds | Mix 2–3 inches into topsoil | Spring or fall |
| Potted Plants | 25% compost in potting mix | When repotting |
| Lawns | 1/4-inch layer + rake | Early spring |
In winter, blanket soil with 1 inch of compost. It protects microbes and enriches materials for spring. Store extra in sealed bins—it keeps for months.
“Compost is the ultimate multitasker. It feeds plants, builds soil, and cuts waste—all for free.”
Conclusion
Transforming waste into garden gold isn’t just eco-friendly—it’s effortless once you start. Balance greens like veggie scraps with browns like dried leaves, keep the pile damp, and troubleshoot odors with extra carbon. Even small steps—like tossing eggshells in a bin—cut landfill waste and nourish soil.
Your environment benefits instantly. Apartment dwellers can use worm bins or donate to community gardens. No space? A $10 countertop container works.
Start today. Healthy plants, richer earth, and eco-pride await. Nature handles the hard part—you just provide the materials.