Table of Contents
Most people have done push-ups wrong their entire lives. Sagging hips. Flared elbows. Half-reps that barely qualify as movement. It’s not laziness — nobody actually taught them how to do a pushup correctly.
Here’s the thing: push-ups are one of the most effective upper body exercises you can do anywhere, any time, with zero equipment. Done right, they build your chest, shoulders, and triceps while demanding real core strength. Done wrong, they’re just expensive floor time that puts stress on your wrists and shoulders for no payoff.
This guide fixes that. Whether you’re doing your first push-up ever or you’ve been grinding out sloppy reps for years, you’re about to rebuild this exercise from the ground up.
What a Push-Up Actually Works
Before you drop to the floor, it helps to know what’s supposed to be working — because if you can’t feel these muscles during the exercise, something is off.
The push-up is primarily an upper body exercise, but it’s not a simple one. Here’s what’s involved:
- Chest muscles (pectoralis major): The main driver of the push-up movement. They contract to push your body away from the floor.
- Triceps: These kick in hard at the top of the push-up as your elbows extend and lock out.
- Front deltoids (anterior shoulders): They assist throughout and take on more load the narrower your hand position is.
- Core: Your abs and lower back work constantly to keep your body rigid. No engagement here, and your hips sag — which turns the exercise into something pointless.
- Serratus anterior: The underappreciated muscle that wraps around your ribs and keeps your shoulder blades tight against your back.
One more thing about the lower body: your glutes and quads are working too, even if you can’t feel them. They help maintain that rigid plank position. Push-ups are a full-body tension exercise disguised as a chest movement.
The Proper Push-Up Position (Get This Right First)
Every rep starts with your setup. A sloppy starting position produces a sloppy push-up. Spend ten seconds here before each set.
Hand Placement
Place your hands on the floor slightly wider than shoulder-width apart — roughly in line with your chest, not your shoulders. Your fingers should point forward or slightly outward. Pressing through all five fingers, not just your palms, distributes load and reduces wrist strain.
A common mistake: placing hands too high, near the shoulders. This shifts the work off your chest and stresses your shoulder joint.
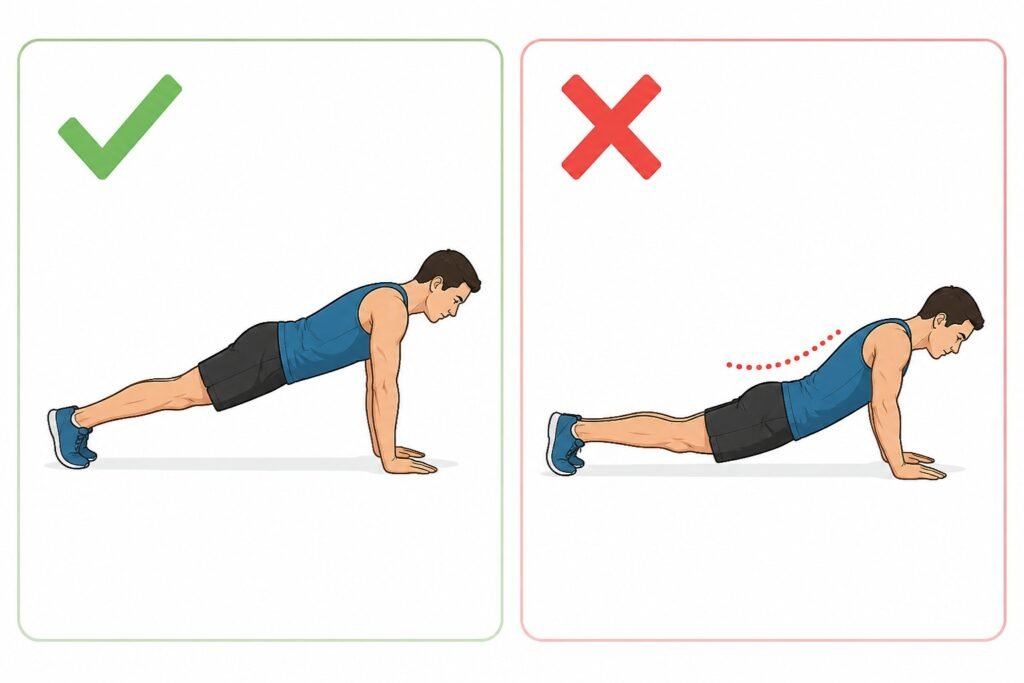
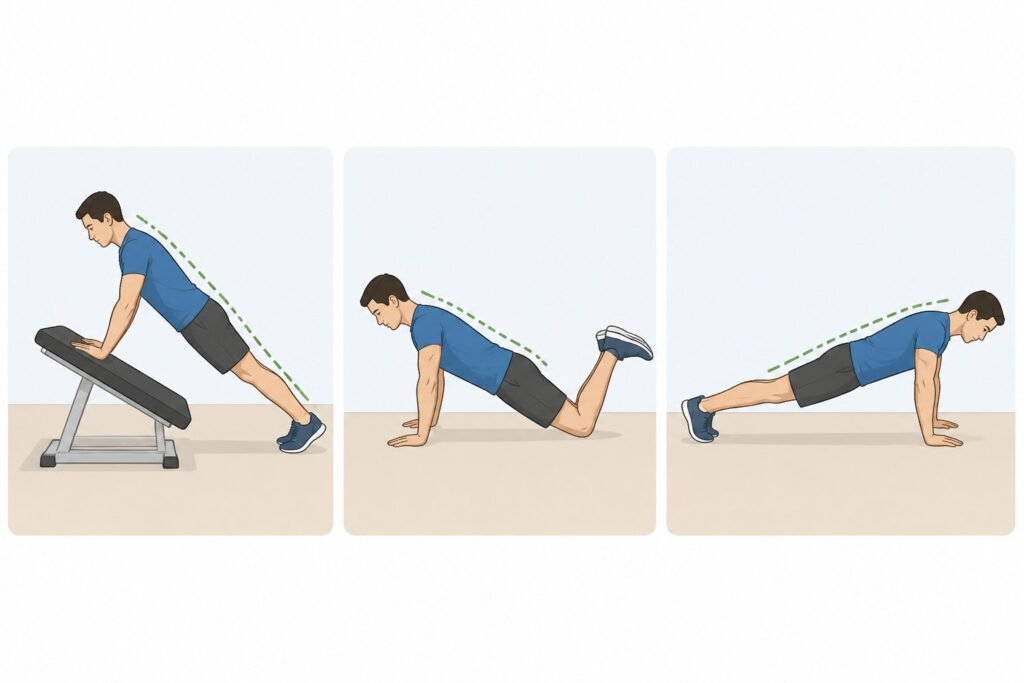
Body Alignment
Your body should form one straight line from the top of your head to your heels. This is essentially a moving plank position. Check these points:
- Head: Neutral, not craning up or tucking down. Your gaze should land about 6–12 inches in front of your hands.
- Hips: Leveled. Not piked up toward the ceiling, not sagging toward the floor.
- Feet: Together or hip-width apart — either works. Wider gives more stability if you need it.
Core and Glutes
Before you move an inch, brace your core like you’re expecting a punch to the stomach. Squeeze your glutes. These two cues alone will fix most form problems immediately.
How to Do a Push-Up Step by Step
Here’s the full push-up movement broken into clear steps. Read through once, then do it slowly.
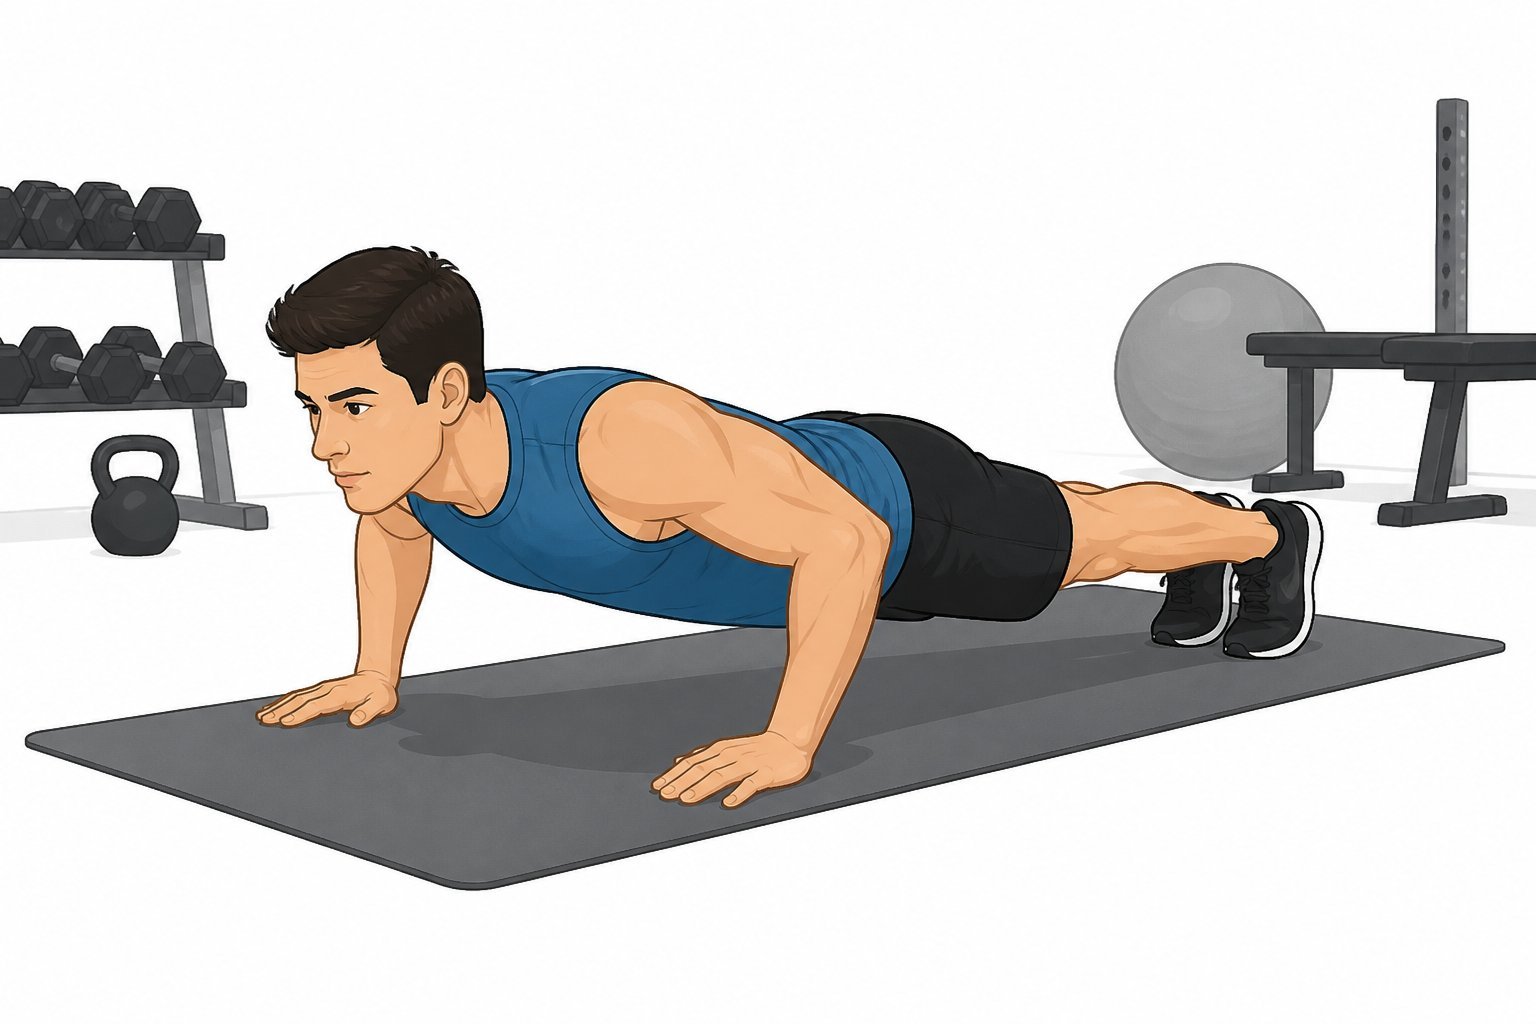
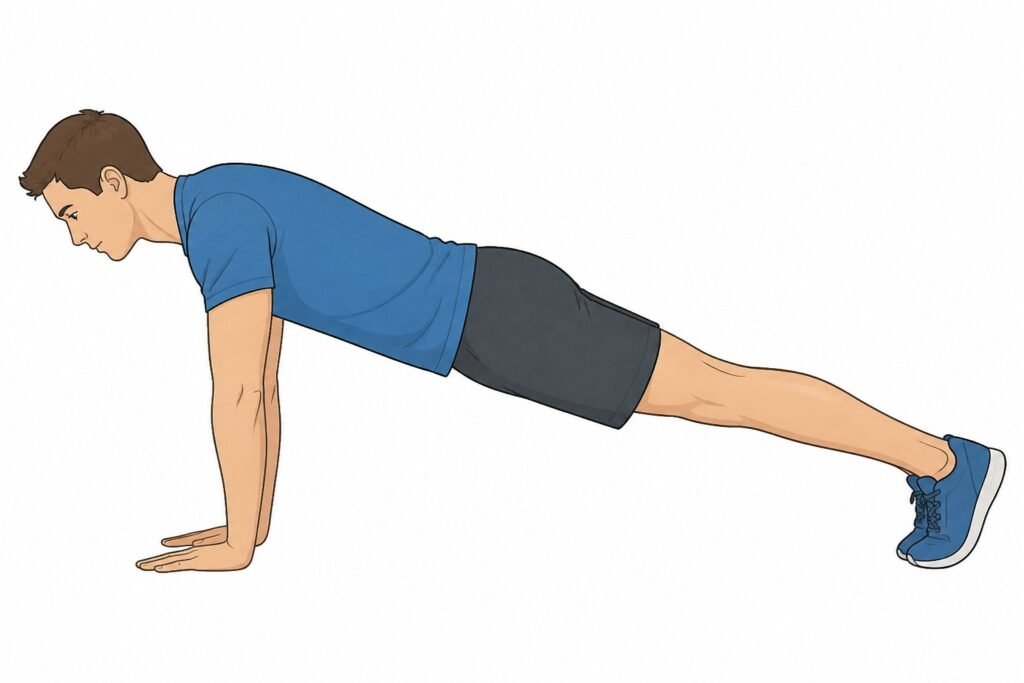
Step 1: Set your starting position. Get into that high plank position — hands under chest, body straight, core tight. This is your starting position for every rep.
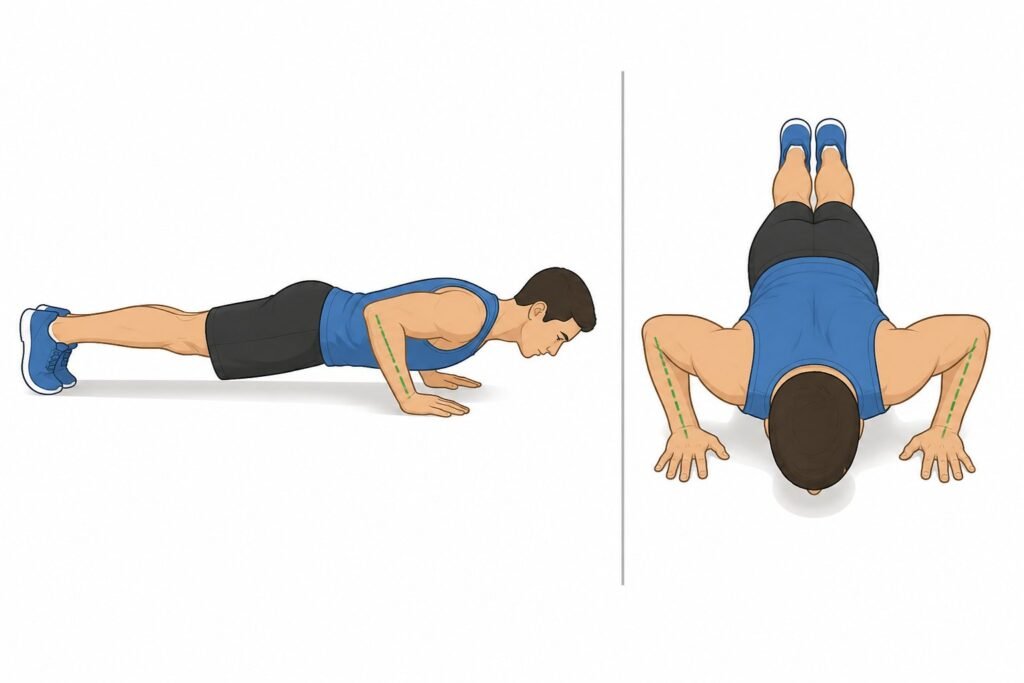
Step 2: Lower yourself with control. Bend your elbows to lower your chest toward the floor. As you descend, your elbows should travel at roughly a 45-degree angle from your torso — not straight out to the sides (that’s hard on your shoulder joints), and not glued to your ribs (that turns it into a pure triceps movement). The angle sits somewhere in between.
Step 3: Get to the bottom. Lower your chest until it either touches the floor or hovers just above it. This is your full range of motion. Stopping halfway is a half rep. It won’t build the same strength, and it trains your body to work in a shortened range.
Step 4: Push back up. Press through your palms and push yourself back to the starting position. Exhale as you push up. Your elbows should extend fully at the top — don’t lock them aggressively, but don’t leave them bent either.
Step 5: Reset. Check your alignment, rebrace your core, and go again.
Common Push-Up Mistakes (And How to Fix Them)
These are the most common push-up mistakes, and almost everyone makes at least one of them.
Hips Sagging or Piking
The problem: Your core isn’t engaged, so gravity wins. Sagging hips turn the push-up into a lower back strain. Piked hips reduce how much your chest and shoulders work.
The fix: Before each rep, squeeze your glutes and brace your core. If you can’t hold a straight line, your push-up variation is too hard — drop to a knee push-up or incline push-up and build from there.
Elbows Flared at 90 Degrees
The problem: Most people picture a push-up with elbows pointing straight out to the sides. This position is actually rough on your shoulder joints, especially over time.
The fix: Pull your elbows in to about 45 degrees from your body. It feels different at first. Your triceps will work harder and your shoulders will thank you.
Partial Range of Motion
The problem: Only going halfway down and calling it a rep. This is the most common form cheat, especially as fatigue sets in.
The fix: Lower your chest to the floor every single rep. If you can’t reach the floor with good form, reduce the number of reps — don’t reduce the range of motion.
Head Dropping or Craning
The problem: Looking straight down at the floor, or craning your neck up to see ahead.
The fix: Keep your head neutral. Look at a spot on the floor about a foot in front of your hands. Your neck should feel relaxed.
Not Breathing
The problem: Holding your breath through the hard parts. This spikes blood pressure and makes reps harder than they need to be.
The fix: Inhale on the way down, exhale on the way up. Simple, but make it a habit.
Beginner Push-Up Progressions: Building Up to the Real Thing
Can’t do a standard push-up yet? That’s completely fine. The standard push-up is the goal, not the starting point. Use these progressions to build the strength you need.
Wall Push-Ups
The easiest entry point. Stand about two feet from a wall, place your hands on the wall at chest height, and perform the push-up movement standing up. The more upright you are, the easier it is.
Wall push-ups train the pushing pattern with almost no load. Once you can do 3 sets of 15–20 with perfect form, move on.
Incline Push-Ups
Place your hands on an elevated surface — a bench, a sturdy chair, or a countertop. The higher the surface, the easier the exercise. Your body is still in a proper push-up position; you’ve just reduced how much bodyweight you’re pressing.
Work your way down to lower surfaces over time. A 12-inch bench is harder than a 30-inch counter.
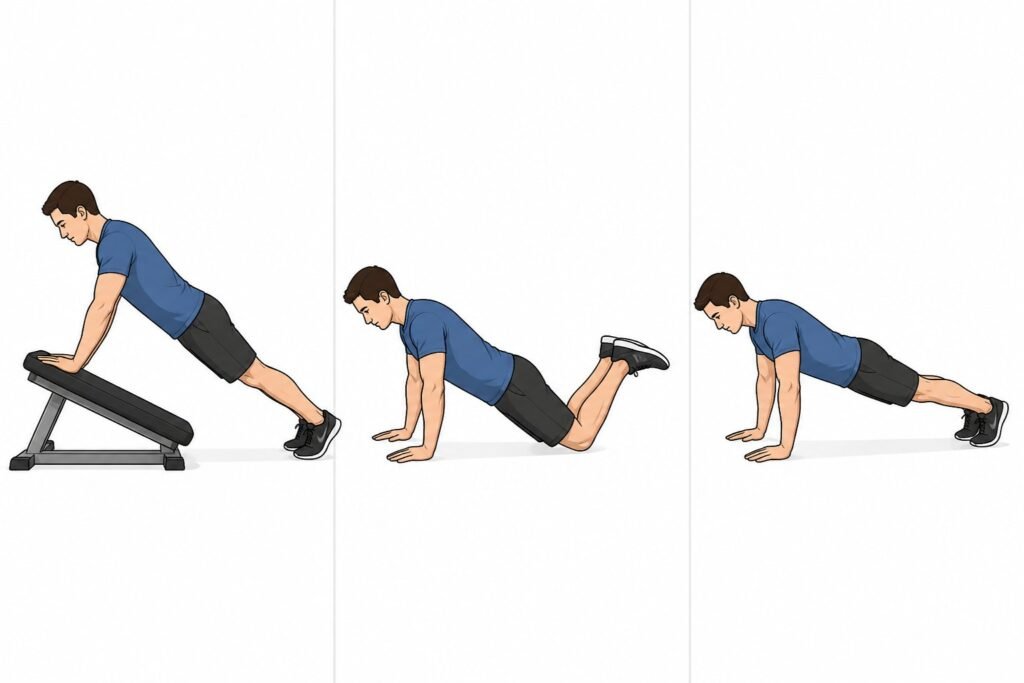
Knee Push-Ups (Modified Push-Ups)
Modified push-ups — also called knee push-ups — are the classic beginner version. You drop your knees to the floor, which shortens the lever and reduces the load.
One important note: keep your body in a straight line from your knees to your head. Don’t let your hips bend. The push-up movement itself should look and feel exactly like a standard push-up — you’ve just shortened the lever.
The Negative Push-Up
This one is underused. Start at the top of a standard push-up position, then lower yourself as slowly as possible — 3 to 5 seconds — until your chest touches the floor. Then put your knees down, reset to the top, and repeat.
You’re training the hardest part of the push-up (the lowering phase) without needing to be able to push back up yet. Four weeks of slow negatives builds real strength fast.
Your First Push-Up Program
You don’t need anything complicated. Here’s a simple push-up program for beginners that works — stick with it for 4 to 6 weeks.
Days per week: 3 (Monday / Wednesday / Friday, or any 3 non-consecutive days)
Pick the right variation: Choose the hardest variation where you can do at least 5 reps with perfect form.
| Week | Sets | Reps | Rest |
|---|---|---|---|
| 1–2 | 3 | 5–8 | 90 sec |
| 3–4 | 3 | 8–12 | 75 sec |
| 5–6 | 4 | 10–15 | 60 sec |
When you can complete all sets and reps with good form, move to the next harder variation. That’s your push-up progression.
Don’t skip rest days. Your muscles build strength during recovery, not during the workout.
Push-Up Variations to Try Once You’ve Got the Standard Down
Once a standard push-up feels solid — meaning you can do 15–20 with proper push-up form and full range of motion — it’s worth exploring what the exercise can become.
Diamond Push-Ups
Place your hands close together under your chest, forming a diamond shape with your thumbs and index fingers. Diamond push-ups shift the emphasis heavily onto your triceps. They’re harder than they look, so expect your rep count to drop.
Wide Push-Ups
The opposite of diamond push-ups. Place your hands wider than normal to build strength in your chest and shoulders. Don’t go so wide that your elbows flare past 90 degrees.
Incline Push-Up (Feet Elevated)
Flip the incline — put your feet on an elevated surface. This shifts the load toward your upper chest and shoulders. The steeper the incline, the more it resembles a shoulder press.
Explosive Push-Ups
Push hard enough that your hands leave the floor. Add a clap if you want to feel impressive. This push-up variation trains power rather than pure strength. Don’t attempt until your standard push-up is solid.
One-Arm Push-Ups
One of the hardest push-up variants there is. You’ll need serious shoulder stability and core strength. Spread your feet wide for balance, keep your body square, and lower yourself with full control.
Push-Up Bars
Push-up bars let your hands rotate during the movement and allow you to go deeper below floor level, increasing the full range of motion of the exercise. They also take pressure off your wrists. Worth the small investment if you’re doing volume work.
How Many Push-Ups Should You Actually Do?
People get weird about this number. The honest answer: enough to challenge you, not so many that your form breaks down.
For building upper body strength: 3–5 sets of 8–15 reps with 60–90 seconds of rest is the sweet spot. Once you can hit the top of that range consistently, make the exercise harder — not longer.
For endurance and conditioning: Higher reps (20+), shorter rest, more sets. But this only makes sense once your push-up form is locked in, or you’re just grinding out sloppy reps that train bad habits.
For beginners: Stop each set 1–2 reps before your form breaks. That’s your real limit, not the number you reach when your hips start sagging.
One clean, full-range push-up is worth more than three half-reps with a sagging back. Every time.
A Few Honest Notes Before You Start
Push-ups will feel harder than you expect if you’ve never done them with correct form. You’ll use muscles you didn’t know were involved. Your core will fatigue before your chest does. Your reps will be fewer. This is normal.
Soreness the first few days is fine — that’s your muscles adapting. Sharp pain in your wrists, elbows, or shoulders is not fine. If something hurts (not burns, but hurts), stop and check your form. Usually it comes down to hand placement or elbow angle.
Give yourself four to six weeks of consistent work. Three days per week with full rest in between, maintaining proper form on every rep. Most people who stick to that simple push-up program are doing real, full push-ups within a month.
That first clean, full-range push-up from the floor is more satisfying than it sounds. Start with the right setup, build from wherever you are, and you’ll get there.