Table of Contents
You’ve had the same gel manicure for three weeks, the edges are lifting, and you’re tempted to just peel the whole thing off. Don’t. That satisfying rip takes a layer of your actual nail with it every single time — and enough of those sessions will leave your nails thin, soft, and splitting for months.
The good news? Removing gel nail polish at home isn’t complicated. It takes about 30–40 minutes, a few cheap supplies, and a little patience. This guide covers every method worth knowing — from the classic acetone wrap to gentler alternatives — plus what to do after to keep your nails healthy.
What You Need Before You Start
Getting everything ready before you touch your nails makes the whole process smoother. You don’t want to be hunting for foil with acetone soaking into your fingers.
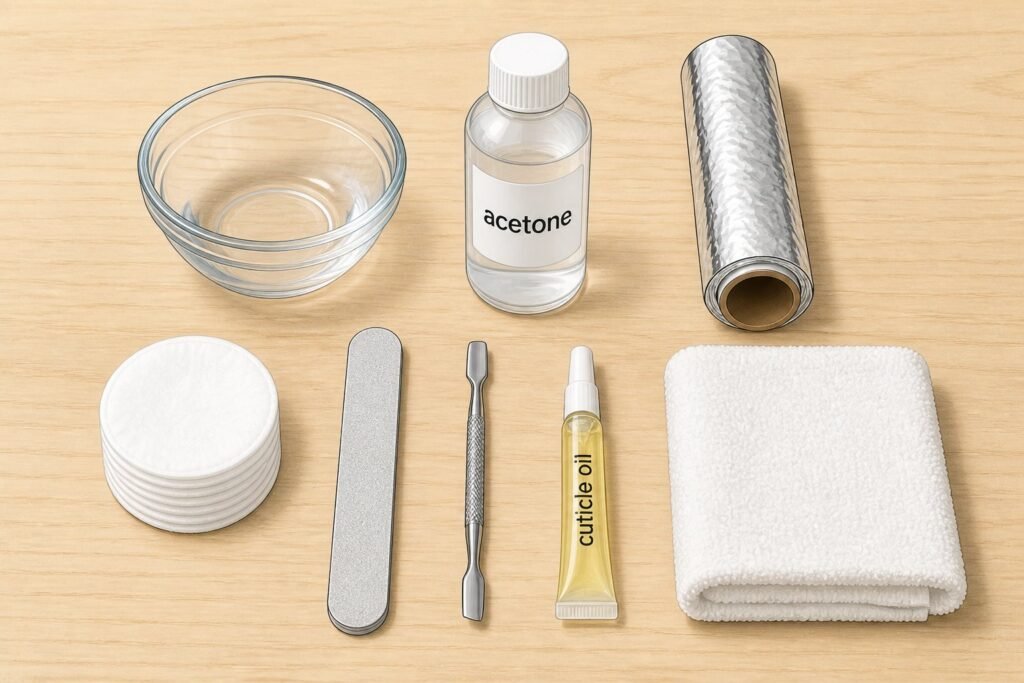
For the acetone soak-off method (most effective):
- 100% pure acetone (not regular nail polish remover — it won’t work on gel)
- Cotton balls or pads
- Aluminum foil, cut into 10 small squares
- A coarse nail file (180 grit works well)
- A cuticle pusher or wooden orange stick
- Cuticle oil or petroleum jelly
- Hand moisturizer for after
Optional but helpful:
- A nail buffer
- A small glass bowl (if you prefer the bowl soak method)
- Gloves — acetone is drying, and keeping it off your skin helps
Pure acetone is easy to find at drugstores or beauty supply stores. It’s usually cheaper than branded gel removers and works better.
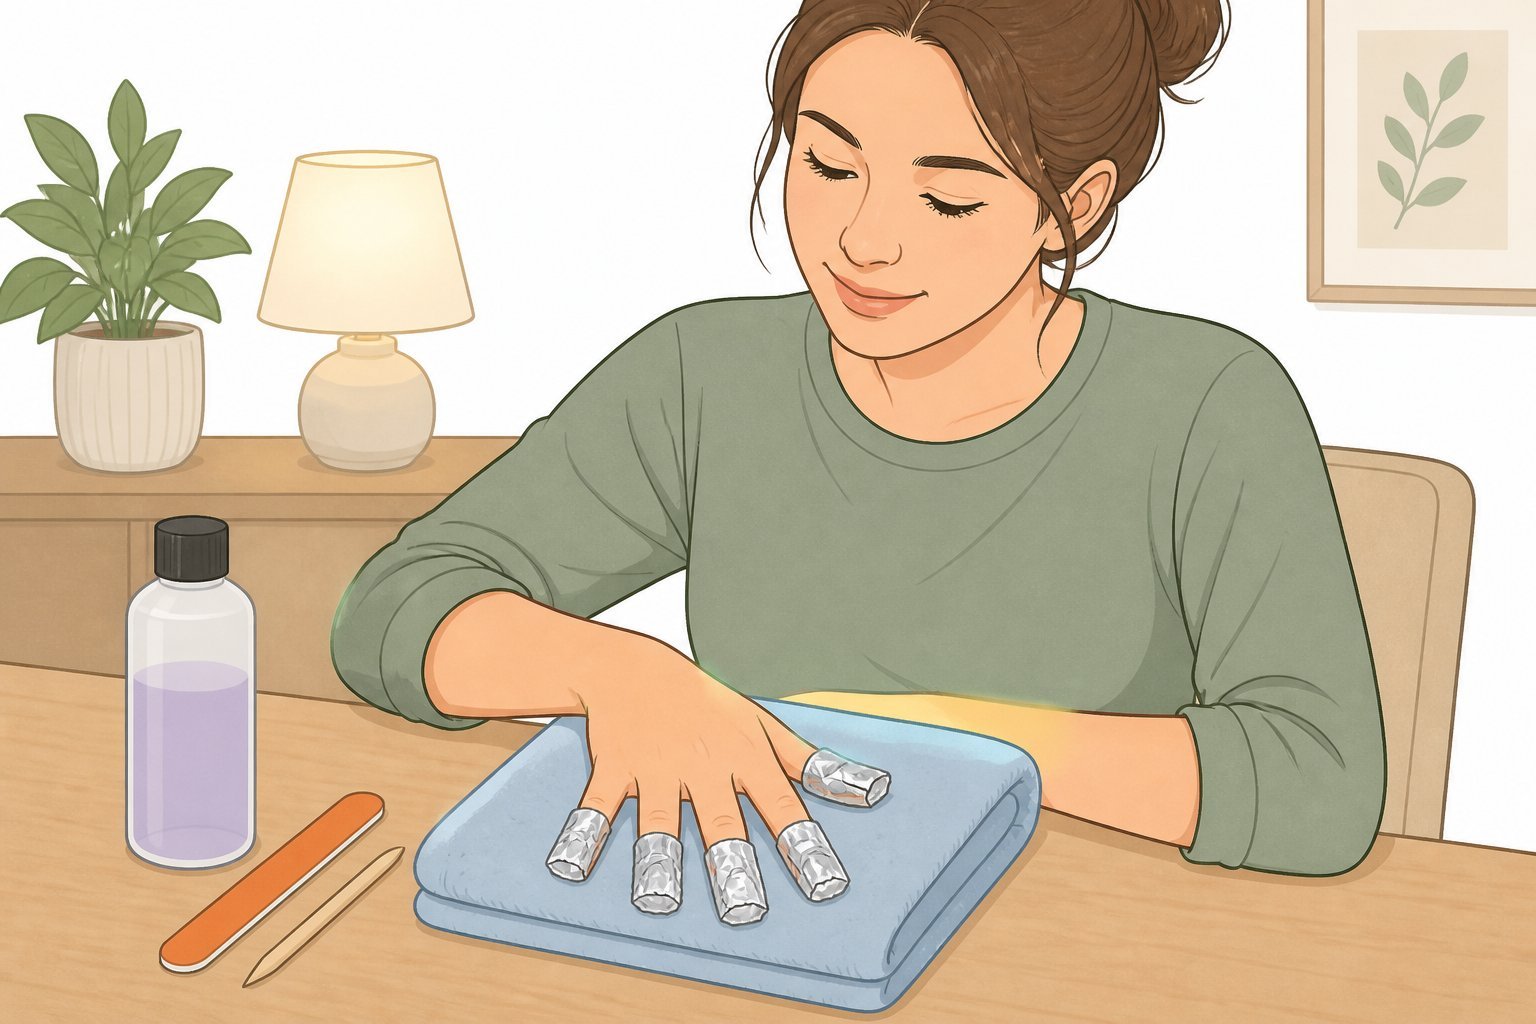
Step-by-Step: The Foil Wrap Method
This is the method professional nail techs use. It keeps the acetone concentrated on your nail and off your skin, and it works faster than bowl soaking.
Step 1 — File the top coat
Use your coarse nail file to scuff up the shiny surface of the gel. You’re not filing down to your nail — you’re just breaking through the top seal so the acetone can penetrate.
File in one direction with light pressure. When the gel looks dull and matte all over, you’re done. This usually takes 30–60 seconds per nail.
Step 2 — Protect your skin
Rub a small amount of cuticle oil or petroleum jelly around the edge of each nail — on the skin, not the nail itself. Acetone is dehydrating, and this barrier limits how much your skin absorbs.
Step 3 — Soak the cotton and wrap
Cut or tear your cotton pads into pieces roughly the size of your nail. Saturate each piece with acetone — it should be wet, not dripping.
Place one cotton piece directly on each nail, then wrap tightly with a small square of foil. The foil holds the cotton in place and keeps the acetone from evaporating. Repeat on all 10 nails.
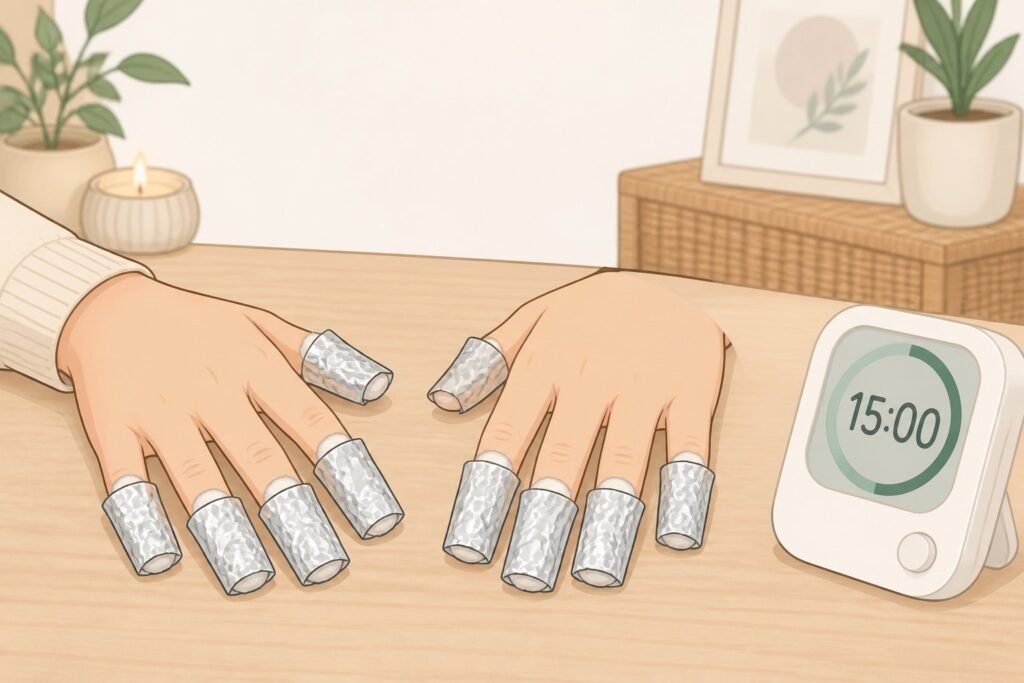
Step 4 — Wait 15–20 minutes
Set a timer and leave the wraps on. Don’t peek early. The gel needs time to fully soften, and pulling off the wraps at the 10-minute mark is what leads to scraping and damage.
If your gel is thick (like builder gel or a gel topper over acrylics), give it the full 20 minutes.
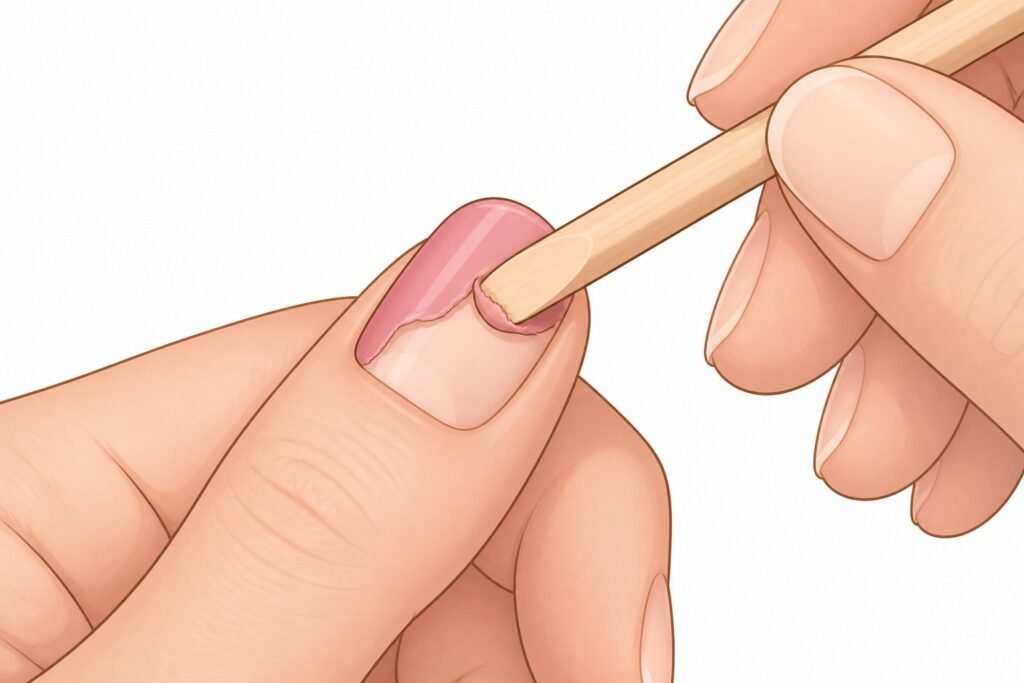
Step 5 — Remove and push off the gel
Unwrap one finger at a time. Press the cotton lightly against the nail as you pull off the foil, then use the flat edge of your cuticle pusher to slide the softened gel off.
It should come away easily — almost like rubber. If it’s still sticking and you have to press hard, wrap it back up for another 5 minutes. Scraping hard is how you thin out your nails.
Step 6 — Buff and moisturize
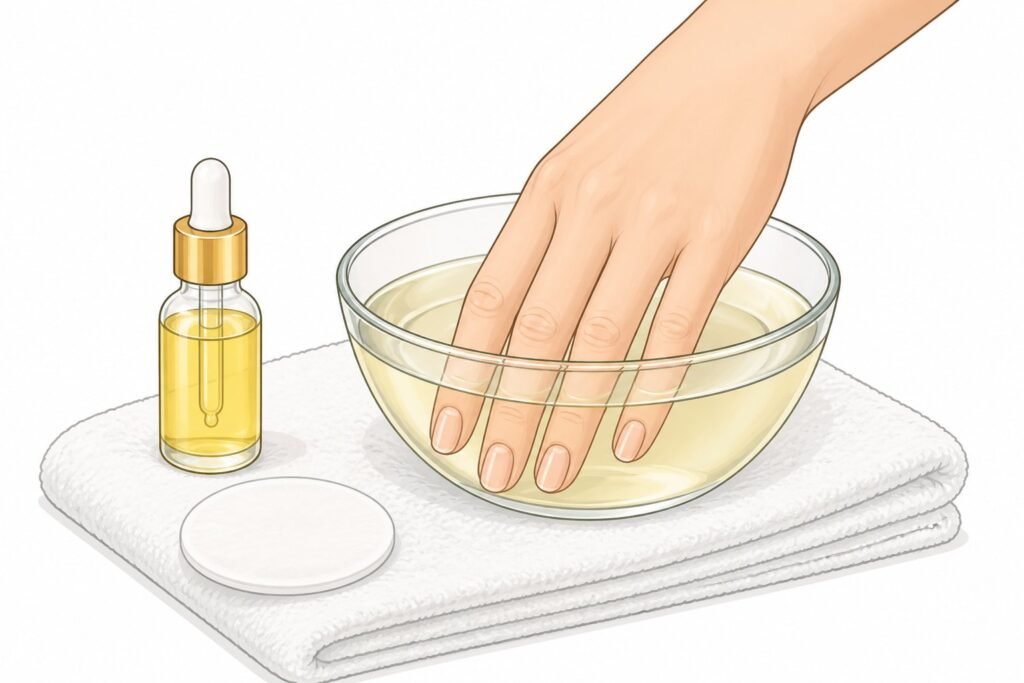
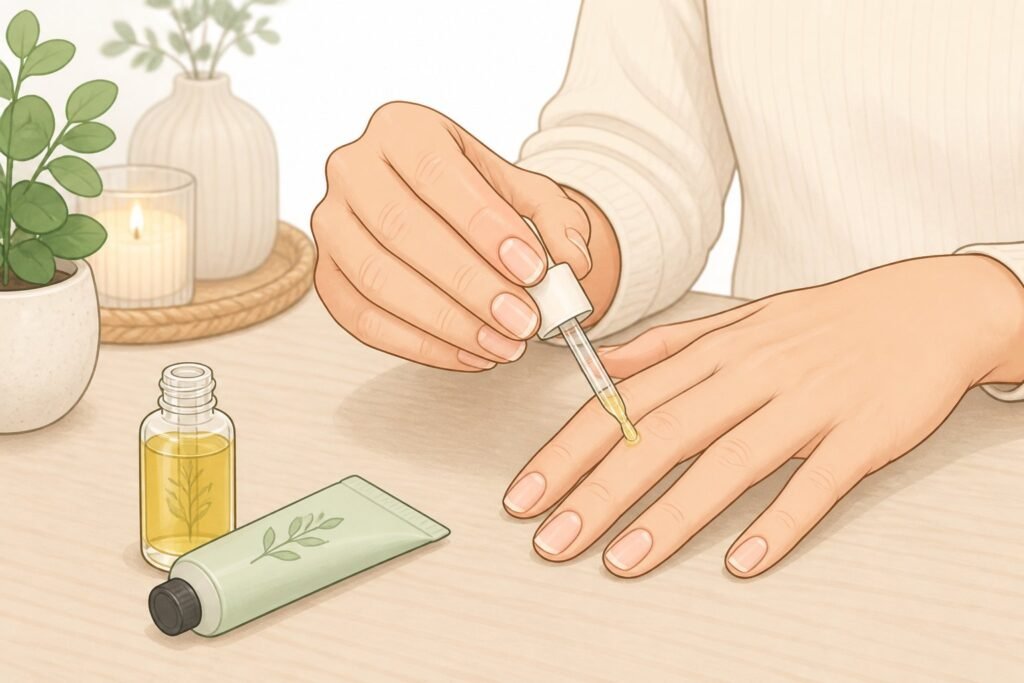
Once all the gel is off, give your nails a gentle buff with a soft buffer to smooth out any remaining residue. Then wash your hands, apply cuticle oil generously, and follow up with a good hand cream.
Your nails will feel a little dry — that’s normal after acetone exposure. The moisturizer helps.
The Bowl Soak Method
If you don’t have foil, you can soak your nails in a bowl of acetone. It’s a bit messier and more drying on your skin, but it works.
File the top coat the same way as above. Then pour enough pure acetone into a small glass bowl to submerge your fingernails. (Use glass — acetone dissolves some plastics.) Soak for 15–20 minutes.
The downside here is that your fingertips are fully submerged in acetone the whole time, which dries the skin significantly. If you go this route, the cuticle oil barrier matters even more, and follow up with heavy moisturizer.
How to Remove Gel Polish Without Acetone
Maybe you’re sensitive to acetone fumes, or you just don’t have any on hand. There are gentler options — they take more time, but they’re worth knowing.
Nail polish remover (non-acetone)
Standard nail polish remover contains ethyl acetate instead of acetone. It won’t dissolve gel on its own, but if your gel is already lifting at the edges, it can loosen things enough to peel the gel off cleanly without damaging your nail.
This only works if the gel is lifting naturally. If the manicure is still fully bonded, non-acetone remover won’t be strong enough to break it down in any reasonable amount of time.
Rubbing alcohol
Rubbing alcohol (isopropyl alcohol, 70% or higher) can soften gel slightly when used with the foil wrap method. It’s not as effective as acetone, and you’ll likely need to soak longer — 30 minutes or more. But it’s a decent emergency option.
File first, soak the cotton in alcohol, wrap, wait, and push off what you can. Repeat if needed.
Warm soapy water soak
This one’s purely for lifting, not dissolving. If your gel manicure is already peeling at the edges, soaking your nails in warm, soapy water for 15–20 minutes can soften the bond enough to gently ease the gel away without pulling.
Don’t force it. If it’s not lifting easily, stop — you need something stronger.
How to Remove Gel Polish at Home vs. at a Salon
Doing it yourself is cheaper (a bottle of pure acetone costs $3–6 at most stores) and faster if you don’t want to book an appointment. You can do it while watching TV.
The main risk at home is impatience. Rushing the soak time, filing too aggressively, or scraping instead of pushing are the moves that damage nails. Nail techs are used to waiting the right amount of time and applying the right pressure — things that feel tedious when you’re doing it to yourself.
If your nails are already compromised — thin, brittle, or peeling — it’s worth getting the removal done professionally at least once. A good nail tech will assess the state of your nails and adjust accordingly.
Common Mistakes That Damage Your Nails
Most nail damage from gel removal comes from a handful of very avoidable mistakes.
Peeling it off. Gel bonds to the top layer of your nail. Peeling it takes that layer with it. Do this enough times and your nails become paper-thin and fragile. It feels satisfying for about two seconds — then you’re looking at a ruined nail for the next three months.
Skipping the filing step. Gel has a sealed top coat. Acetone can’t break through it efficiently without some surface roughing. Skipping the file means you’ll soak twice as long and still have residue left over.
Not soaking long enough. The gel needs to go from firm to soft and rubbery before you try to remove it. If you’re pressing hard with the cuticle pusher, the gel hasn’t soaked enough. Wrap it back up. Five more minutes beats damaging your nail.
Using a metal tool to scrape. Metal scrapers and metal cuticle pushers are too aggressive for this. Stick to a wooden orange stick or a plastic cuticle pusher.
Ignoring aftercare. Acetone strips moisture from your nails and skin. If you remove gel and do nothing afterward, you’ll notice dry, brittle nails within a few days. Cuticle oil and hand cream are non-negotiable parts of the process.
Nail Care After Gel Removal
Your nails just went through something. Even with a perfect removal, they’ve had gel bonded to them for weeks and just spent 20 minutes in acetone. They need some recovery time.
The first 24–48 hours:
- Apply cuticle oil 2–3 times a day
- Use a rich hand cream at night
- Avoid soaking your hands in hot water (baths, long dishwashing sessions)
The first week:
- Give your nails a break from gel if you can — even a week of going bare helps them recover
- If you want color, regular nail polish is a gentler option temporarily
- If nails feel very soft or bendy, a nail strengthener or a thin coat of clear polish can add protection
If your nails look white or chalky after removal: this is normal. It’s called dehydration and usually resolves within a few days with regular moisturizing. It’s not damage — it’s just dryness.
How Often Can You Get Gel Nails?
Gel manicures are hard on nails when they’re done back-to-back without any recovery time. Most nail techs recommend taking a break — even just one to two weeks — between gel applications, especially if you notice your nails thinning or peeling at the free edge.
The removal process is often harder on nails than the gel itself. If you’re careful about removal and give your nails a brief break every few cycles, you can wear gel regularly without significant long-term damage.
Signs you should take a longer break:
- Nails feel thin or bend easily
- You see white patches or horizontal ridges
- Nails are splitting at the tip more than usual
- Cuticles are consistently dry or cracked
None of these are permanent — nails grow out fully in about 4–6 months — but catching them early makes recovery faster.
The Short Version
File the surface. Soak with pure acetone using the foil wrap method for 15–20 minutes. Push off gently with a cuticle stick. Moisturize. That’s it.
The whole thing takes under an hour and costs almost nothing compared to a salon visit. The only thing standing between you and undamaged nails is resisting the urge to peel, rush, or scrape. Give the acetone time to do its job, and your nails will thank you.