Table of Contents
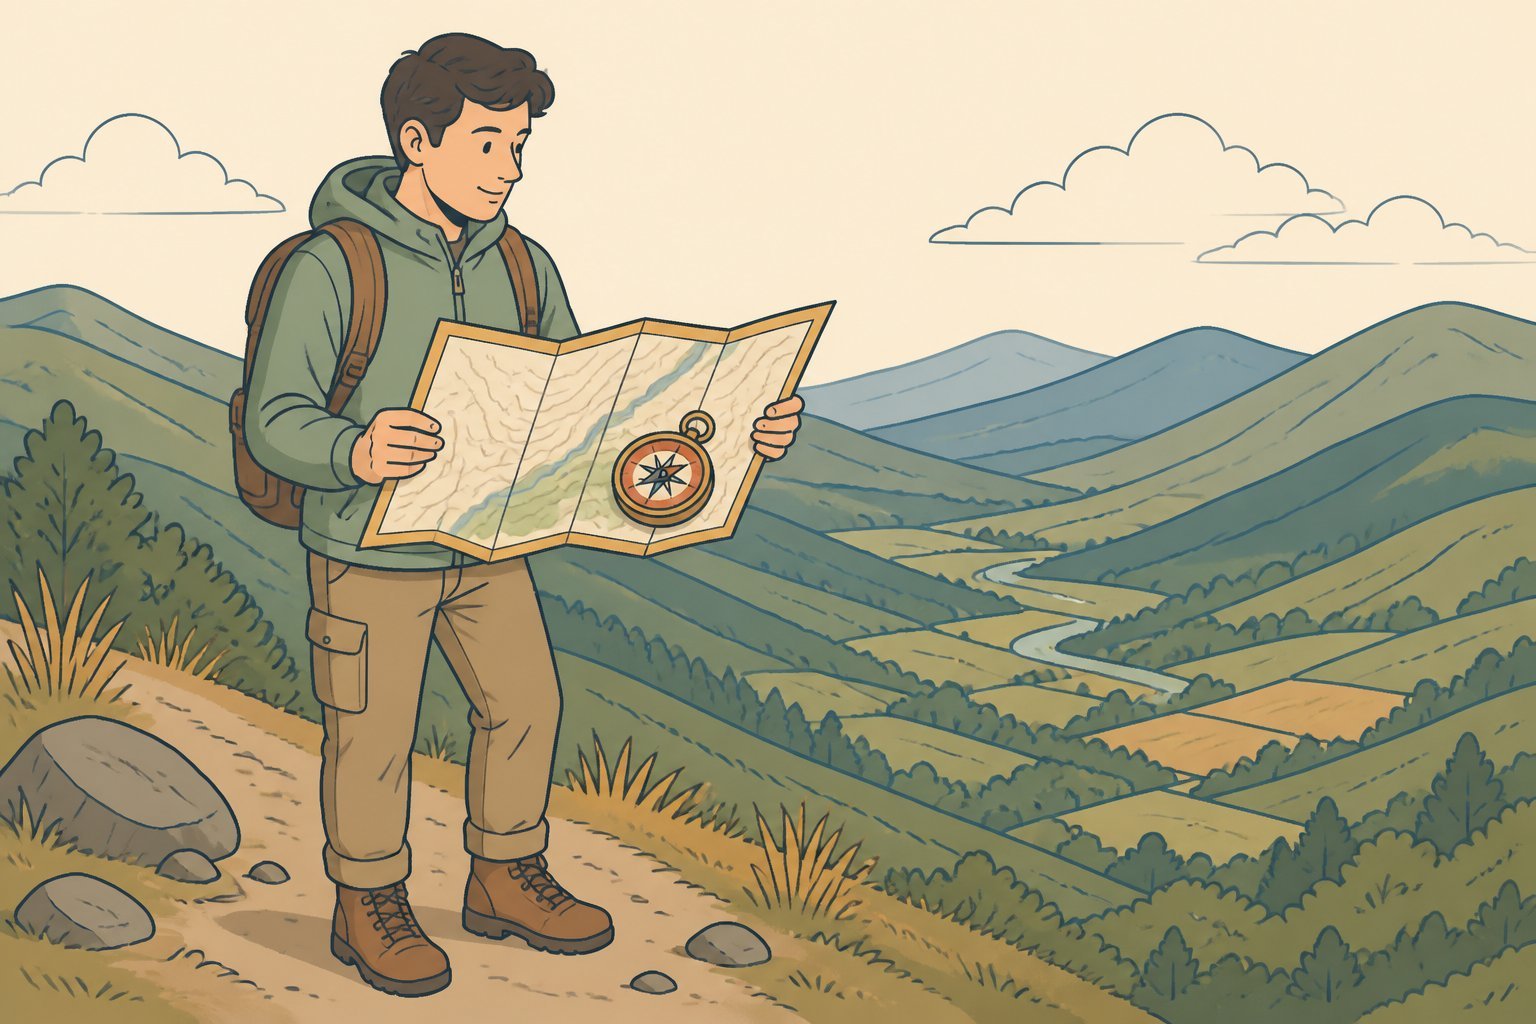
You’re standing at a trail junction with two possible paths ahead. Your phone is dead. You have a paper map and a compass, and absolutely no idea what you’re looking at. This scenario happens more than people expect — and it never ends well if you’ve never actually learned map reading before you needed it. Reading a map isn’t complicated once you understand the logic behind it. The symbols, the lines, the grid — they all follow a consistent system that, once you see it clearly, makes the landscape around you click into focus. Here’s how to read a map properly, from the basics up.
Start With the Map Legend
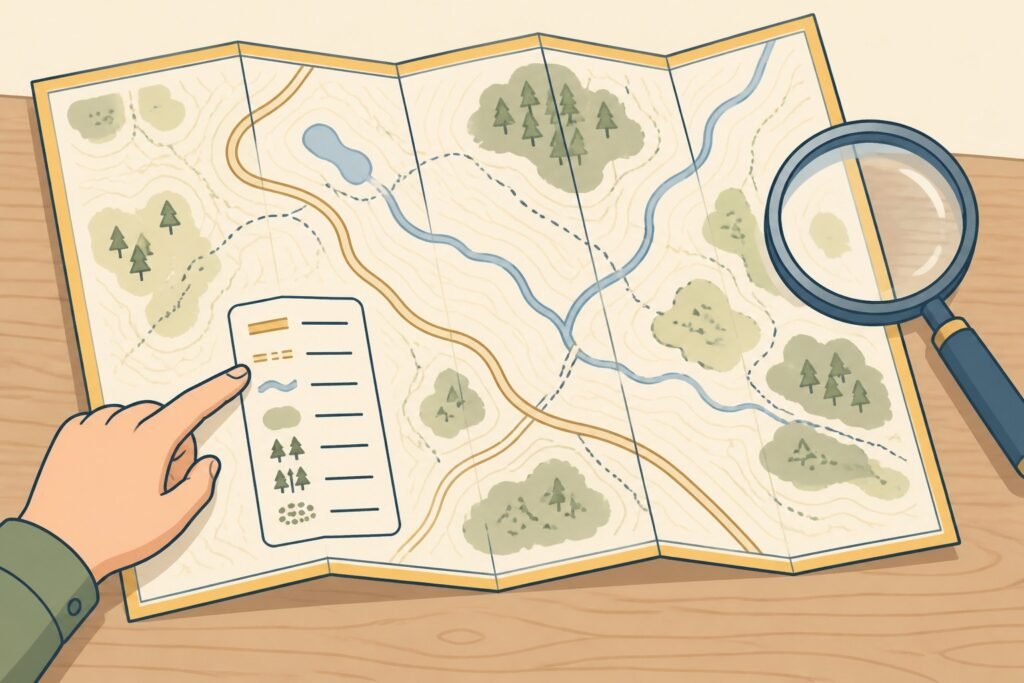
Before you try to interpret the map at all, look at the legend (sometimes called the key). It’s usually in a corner of the map, and it tells you what every symbol means.
Every map uses a slightly different set of symbols, so assuming you already know what the symbols mean is a mistake. A blue line might mean a river on one map and a footpath on another. A dotted line could be a national boundary, a hiking trail, or an administrative border depending on the map type.
The map legend decodes all of this. Spend two minutes studying it before anything else.
Common symbols to look for:
- Roads (different line weights for different road types)
- Water features — rivers, lakes, marshes
- Settlements — towns, villages, isolated buildings
- Vegetation — woodland, moorland, farmland
- Footpaths, bridleways, and restricted access land
On an Ordnance Survey (OS) map in the UK, or a USGS topo map in the US, the legend is detailed enough to give you a full picture of what every mark on the map represents.
Understanding Map Scale
Map scale tells you the relationship between distance on the map and distances on the ground. It’s the single most important number on the map — and most people skip right past it.
A scale of 1:25,000 means one unit on the map represents 25,000 of the same unit in the real world. So one centimetre on the map is 25,000 centimetres on the ground — which works out to 250 metres. One inch on the map equals roughly 0.4 miles.
Common Scale Maps and What They’re For
1:25,000 (Explorer maps, USGS 7.5-minute series) — The most useful scale for walking and hiking. High detail, shows individual field boundaries, footpaths, and buildings. Covers a smaller area.
1:50,000 (OS Landranger, UK) — Covers more ground but with less detail. Good for cycling, driving routes, and planning longer trips.
1:250,000 and above — Road atlas-level. Shows towns and major roads, but terrain features disappear at this scale.
The higher the second number in the ratio, the less detail you see. A 1:250,000 map has less detail than a 1:25,000 map. Simple enough, but easy to forget when you’re looking at a map for the first time.
To measure distance on the map, use a ruler or the edge of your compass against the map’s scale bar, then count off the units on the ground.
How the Grid Works
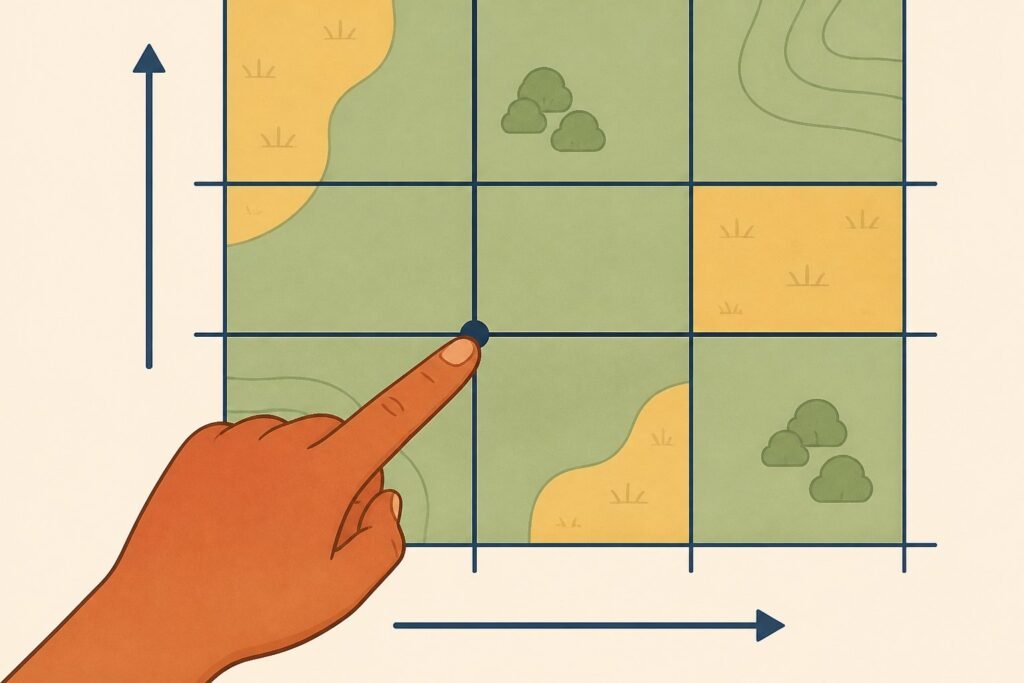
Most maps use a grid — a series of evenly spaced vertical lines and horizontal lines that make up a grid across the entire map surface. These grid lines exist to give every point on the map a unique address, called a grid reference.
Vertical lines running from top to bottom are called eastings — they increase in value as you move east (right).
Horizontal lines running left to right are called northings — they increase as you move north (up).
Reading a Grid Reference
A standard four-figure grid reference identifies a 1km square. A six-figure grid reference narrows it down to a 100-metre square.
To read any point on the map, go along the eastings first (left to right), then up the northings. The old mnemonic is: along the corridor, then up the stairs.
For example, a six-figure grid reference of 432 718 means: easting 43.2, northing 71.8.
Grid north — the direction grid lines run on the map — is close to, but not exactly the same as, true north or magnetic north. This matters when you’re using a compass alongside the map, and we’ll come back to it.
Contour Lines: Reading the Shape of the Landscape
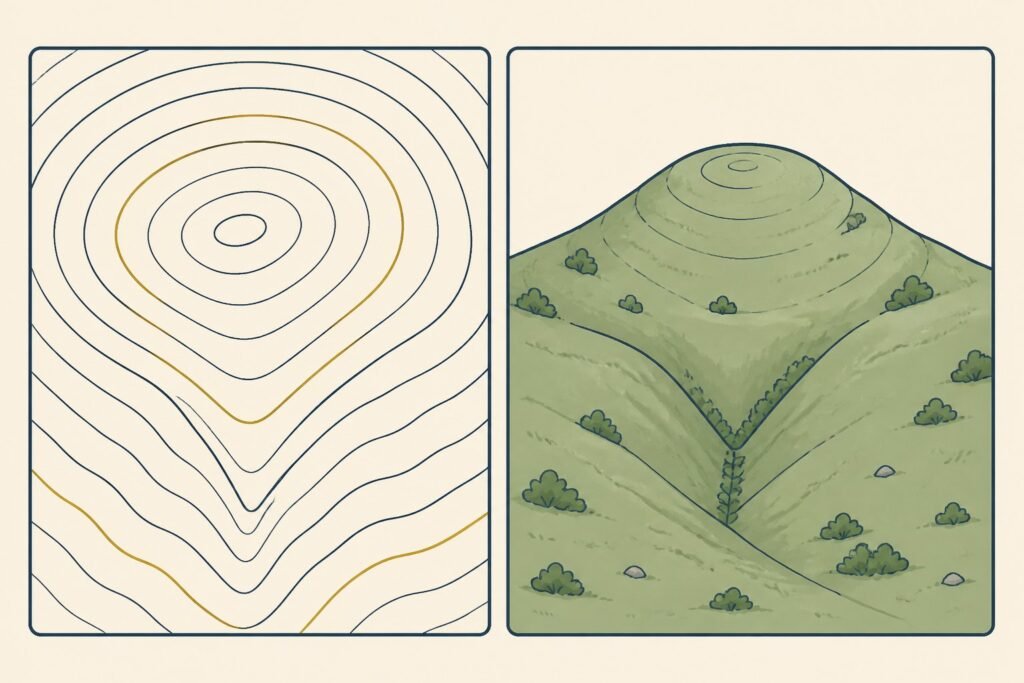
This is the part of map reading that transforms a flat piece of paper into a three-dimensional picture in your mind. Contour lines represent the real height of the land — each line connects all points at the same height above sea level.
Key things to know:
- Every contour line on a standard 1:25,000 map represents a height change of 10 metres
- Every fifth contour line is drawn thicker — this is called an index contour, and it’s usually labelled with the elevation
- The closer together the contour lines, the steeper the slope
- Contour lines that are spread far apart indicate gentle, flat ground
- When lines represent the real world’s valleys, they form a V or U shape pointing uphill (into the valley)
- A hill summit shows as concentric rings getting smaller toward the centre
Spotting Hills, Ridges, and Valleys
Once you get a feel for contour lines, you start seeing the landscape rather than just lines on a map. A ridge shows as a long, thin series of parallel contours. A valley shows as contour lines that point uphill in a U or V.
The steeper the slope, the closer together the lines become. In extreme terrain — cliff faces — contour lines may actually merge.
Practise by checking the map against terrain you can already see. Look at a hill nearby, find it on the topo map, and trace the shape of the landscape in the contour pattern. That link between the map and the real world is what map reading actually is.
Types of Maps and When to Use Each
Not every map is right for every situation. Type of map matters before you even start navigating.
Topographic map (topo map) — Shows elevation changes via contour lines. The standard choice for hiking, walking, and any outdoor navigation where terrain features matter. A USGS topo map in the US or an OS Explorer map in the UK falls into this category.
Street map — Shows roads, street names, and urban infrastructure. No terrain data. Fine for driving and city navigation but useless in the hills.
OS map — Ordnance Survey maps cover Great Britain at multiple scales. The 1:25,000 Explorer series is the gold standard for UK outdoor navigation, showing rights of way, field boundaries, and full topographic detail.
Trail or park map — Simplified maps produced by trail managers. Useful for staying on marked routes but often lack the detail needed for off-trail navigation.
Geological survey maps — Produced by the United States Geological Survey (USGS) and similar bodies. These show rock types, fault lines, and landforms, used mainly by geologists and land managers.
When you’re heading into serious terrain — mountains, moorland, anything remote — a topo map is non-negotiable. A trail map won’t tell you what’s on the other side of that ridge.
Using a Compass With Your Map
A compass and map together are far more powerful than either alone. But there’s a small wrinkle: the compass points to magnetic north, while maps are aligned to grid north. These aren’t the same, and ignoring the difference — called magnetic declination — can send you meaningfully off course over distance.
Orienting the Map
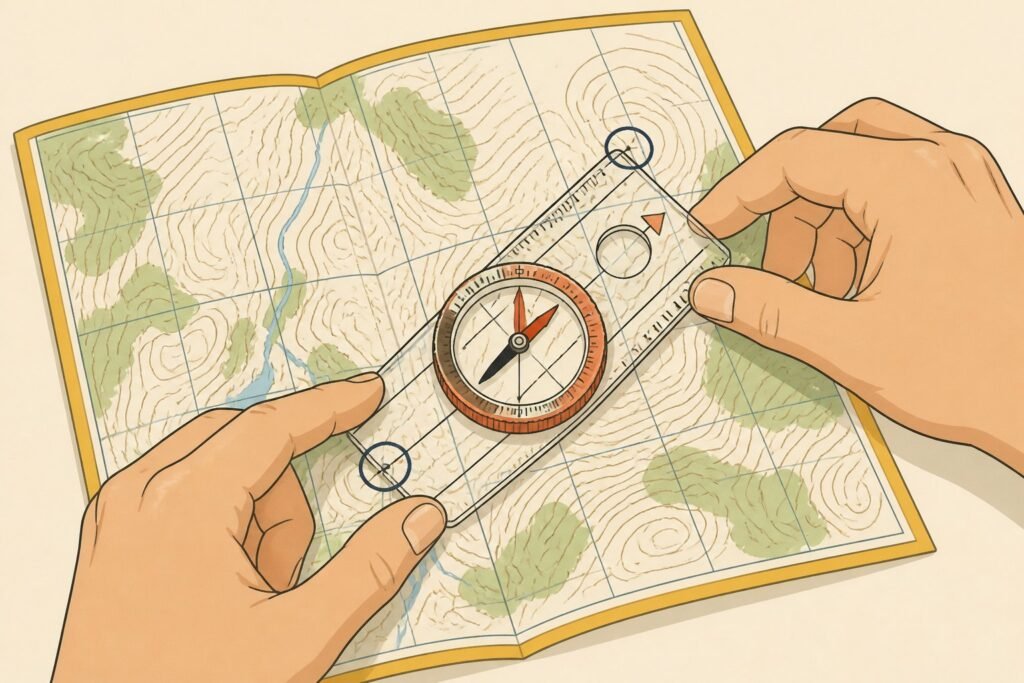
To orient the map correctly:
- Place the edge of your compass along the grid lines on your map so the direction of travel arrow points toward north on the map.
- Turn the compass bezel so the orienting lines inside align with the grid lines.
- Rotate the map and compass together until the compass needle lines up with the orienting arrow — when the arrow lines up with grid north, your map is oriented to the real world.
Now the map represents what’s actually in front of you. Features on the ground should match what you see on the map.
Taking a Bearing
To walk in a specific direction from a point on the map:
- Place the edge of your compass between your starting point and your destination on the map.
- Rotate the bezel until the orienting lines align with the map’s grid north.
- Lift the compass off the map and rotate your body until the compass needle lines up with the orienting arrow.
- The direction of travel arrow now points toward your destination.
Adjust for magnetic declination using your map’s margin information. In most of the UK, the correction is a few degrees west. In the western US, it can be 15–20 degrees.
How to Orient Yourself Using Landmarks
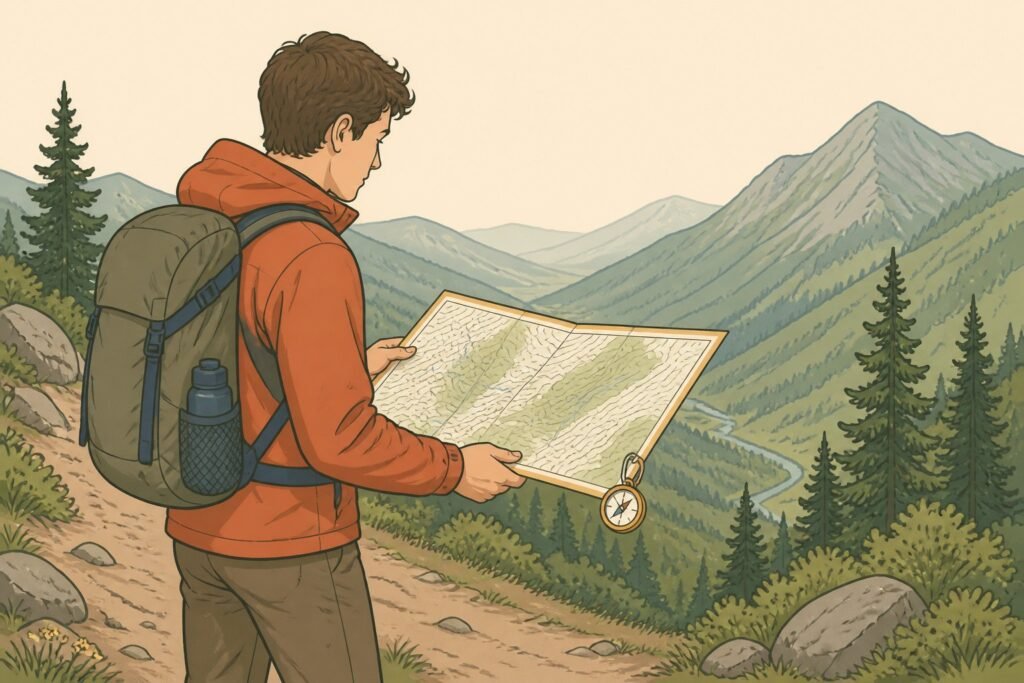
You don’t always need a compass to read the map. When you can see on the map what you can see on the ground, you can orient yourself using landmarks alone.
Pick two or three features you can identify: a hilltop, a road junction, a river bend. Find each one on the map. The relationship between those features on the map should match what you see in front of you. Rotate the map until it does — now north on the map is pointing toward actual north, and the map correctly shows the terrain around you.
This technique — called resection when done formally — is one of the most underrated outdoor skills. It means you can check the map at any point along a walk and confirm exactly where you are, even without a compass or GPS signal.
A good habit: pick a landmark ahead of you before you start moving, find it on the map, and use it to guide your direction of travel. When you reach it, pick the next one. This is how confident map readers move through terrain — not staring at the map constantly, but checking it at key points.
Common Mistakes When Reading a Map
Even people who’ve used maps for years make these.
Forgetting to check the scale. Walking estimated distances without checking the map scale leads to bad timing and worse decisions. Always verify: one inch on the map equals how much distance on the ground?
Ignoring the legend. Assuming you know what a symbol means is a fast way to end up on the wrong path. Check it.
Not orienting the map. Looking at a map without aligning it to your direction of travel is confusing and error-prone. Rotate it so north on the map faces north in the world.
Confusing grid north and magnetic north. If you’re using a compass off the map to navigate, the magnetic declination matters. Skipping this adjustment compounds into significant navigational error over a few kilometres.
Only reading the map when you’re lost. Read the map before you’re unsure. Use it proactively, checking your position at landmarks, junctions, and any time you turns or changes in direction.
Getting Better: How to Actually Learn Map Reading
Reading about maps and reading maps are different things. The only way to get genuinely good at this is to use a map somewhere you already know, then work up from there.
Start in a familiar place. Take an OS map or USGS topo map of your local area. Walk a route you know well and track it on the map in real time. Match the contours to the hills, the symbols to the features, the grid to your position.
Use the map and compass together. Even on an easy walk, practice taking a bearing before you move off and confirming your position from landmarks. Mountain rescue teams will tell you this skill takes repetition to become reliable under pressure.
Try orienteering. It’s essentially a sport built around map reading and navigation. One afternoon at a local event will teach you more than a week of reading about it.
Get the right map. For UK walks, the OS Explorer 1:25,000 series is the standard. For the US, the USGS 7.5-minute series topo map covers the country at the same useful scale. These are the maps to learn on.
Map reading is one of those outdoor skills that fades without use. The good news: once it clicks, it really sticks. A paper map and a competent reader will get you home when every other option has failed.