Table of Contents
You bought the seeds. You watched a few videos. You told yourself this was the year. And now you’re staring at a patch of grass in your backyard wondering where on earth to actually begin.
Starting a garden for the first time doesn’t have to be complicated — but it does require doing things in the right order. Skip a step and you’ll fight weeds all season, grow vegetables that never fruit, or water a garden that drains everything straight through the soil. This step-by-step guide covers everything a new gardener should know: from picking the right spot to your first harvest.
Step 1: Choose the Best Location for Your Garden
Everything flows from this one decision. A great garden in the wrong spot will fail. A mediocre setup in the right spot will surprise you.
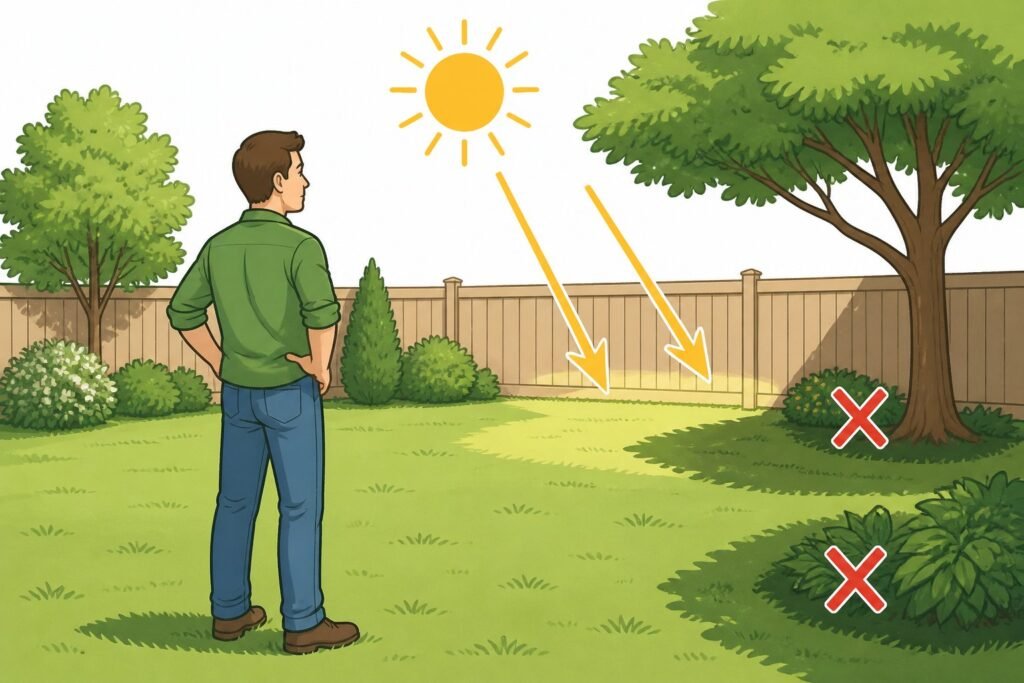
Look for Full Sun First
Most vegetables need at least 6–8 hours of direct sunlight per day. Full sun is non-negotiable for crops like tomatoes, cucumbers, and peppers. Leafy greens like lettuce and spinach are a bit more forgiving and can handle partial shade.
Walk your yard at different times of day and note where the sun falls and for how long. That sunniest, most open patch of ground? That’s your garden location.
Check for Flat Ground and Good Drainage
Avoid low spots where water pools after rain. Poor drainage drowns plant roots and invites disease. A gentle slope is fine — flat is better. If your only option is low ground, raised beds (more on those shortly) solve the drainage problem entirely.
Stay Close to a Water Source
Hauling a garden hose across a 200-foot yard gets old fast. Ideally, your garden area sits within easy reach of an outdoor spigot. You’ll water more consistently when it doesn’t feel like a workout.
Step 2: Decide What Type of Garden You Want
Before you break ground, decide what type of garden setup makes sense for your space, budget, and soil situation.
Raised Garden Beds
Raised beds are the most popular choice for new gardeners, and for good reason. You fill them with quality soil from the start, so you sidestep whatever clay, rock, or poor drainage your yard might have. They warm up faster in spring, drain well, and make weeding much easier.
A standard raised bed is 4 feet wide (so you can reach the center from either side) and 6–12 inches deep. Two 4×8 beds give you a solid 64 square feet of growing space — enough to start a vegetable garden that actually produces food.
In-Ground Garden
An in-ground garden is exactly what it sounds like: you dig directly into the ground and plant there. It costs less to start and works well if you already have decent soil. The tradeoff is more work upfront to amend the soil and manage weeds.
An in-ground garden bed of 100–200 square feet is a reasonable start. Bigger isn’t better when you’re learning — you’ll thank yourself come mid-summer when the weeding gets serious.
Container Garden
No yard? No problem. A container garden on a patio, balcony, or rooftop works better than most people expect. Tomatoes, herbs, cucumbers, and greens all grow well in containers. You’ll need pots at least 12 inches deep for most vegetables, and you’ll water more often since containers dry out fast.
Step 3: Test and Improve Your Garden Soil
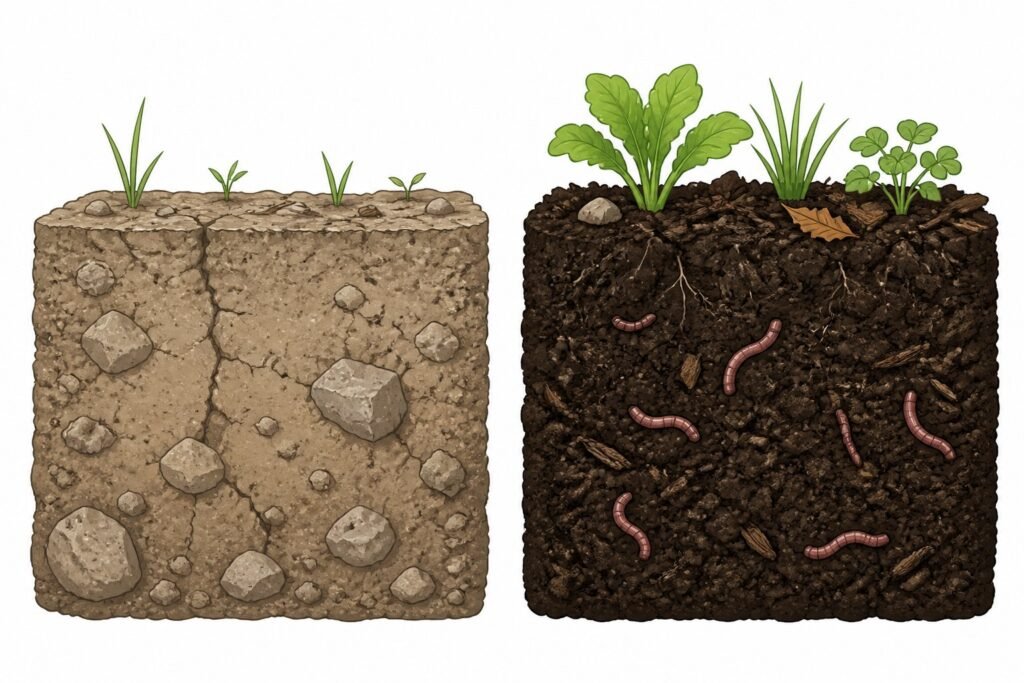
Soil is the single most important factor in how well your garden grows. You can have the best seeds, the ideal location, and a perfect watering schedule — but if your soil is wrong, you’ll get mediocre results.
Do a Soil Test
A basic soil test tells you your soil’s pH and nutrient levels. You can get a test kit at any garden center for around $10–$20, or send a sample to your local cooperative extension office for a more detailed report.
Most vegetables prefer a pH between 6.0 and 7.0. If your soil test shows your pH is off, you can raise it with lime or lower it with sulfur.
Add Organic Matter
Whatever your soil type — clay, sand, or somewhere in between — adding organic matter improves it. Work in 2–4 inches of compost, aged manure, or a mix of both. This improves drainage in clay soils, helps sandy soils hold moisture, and feeds the soil biology that feeds your plants.
For raised beds, use a mix of topsoil, compost, and a small amount of perlite or coarse sand for drainage. A 60/30/10 blend (topsoil/compost/perlite) is a reliable starting point.
Step 4: Make Compost (or Buy It)
Compost is decomposed organic material — kitchen scraps, yard waste, leaves — that feeds your soil like nothing else can. It adds nutrients slowly and steadily, improves soil texture, and keeps beneficial organisms thriving underground.
You can make compost at home with a simple bin or pile. Layer “greens” (vegetable scraps, grass clippings, coffee grounds) with “browns” (dried leaves, cardboard, straw) in roughly a 1:3 ratio. Keep the pile moist and turn it every week or two. In 2–3 months, you’ll have dark, crumbly compost ready to use.
If you don’t want to make compost, buy a few bags at the nursery or garden center. It’s one of the best investments you can make in your first garden.
Step 5: Plan Your Garden Design and Plant Choices
This is the fun part — but also where new gardeners tend to overdo it. Start small. Seriously. A modest, well-managed garden bed will outperform a sprawling, chaotic one every single time.
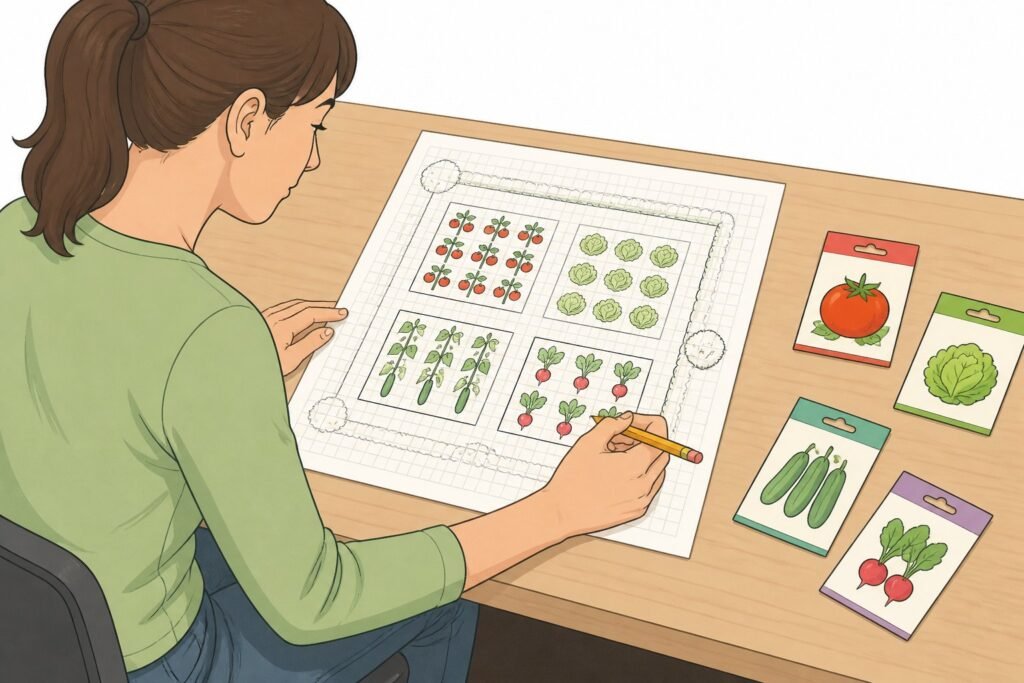
Choose Easy, Rewarding Vegetables
For a first garden, stick with vegetables that are forgiving and produce fast results. These are the ones that keep new gardeners coming back:
- Lettuce — grows fast, doesn’t need much space, tolerates some shade
- Radishes — ready in as little as 25 days, great for learning the basics
- Green beans — low-maintenance, highly productive
- Cucumber — grows quickly, especially with a trellis to climb
- Zucchini — one plant produces more than you’ll know what to do with
- Tomatoes — satisfying to grow, though they need consistent water and staking
Read the seed packet for each plant — it tells you spacing requirements, days to harvest, and whether to start indoors or direct sow. Don’t ignore it.
Think About Space and Spacing
Overcrowding is one of the most common mistakes. Plants need space for air circulation, root development, and light. Follow the spacing guide on each seed packet or plant tag.
Use vertical space where you can. A trellis lets cucumbers, beans, and small squash grow up instead of out — saving valuable garden space for other crops.
Garden Paths Matter
If your garden is large enough to require walking between beds, plan garden paths from the start. Even a simple strip of mulch or stepping stones keeps you from compacting the soil where your plants are growing.
Step 6: Plant Your Seedlings and Seeds
You’ve got your space, your soil, your plan. Now it’s time to actually plant.
Starting From Seed vs. Buying Transplants
Starting from seed is cheaper and gives you access to more varieties. You can start seeds indoors 4–8 weeks before your last frost date, then transplant them outside once the soil warms up and the weather stabilizes.
Buying seedlings from a nursery skips the indoor seed-starting phase. It costs more, but it’s a legitimate shortcut — especially for your first garden. Most garden centers carry healthy transplants of all the common vegetables.
Hardening Off Seedlings
If you started seeds indoors or bought greenhouse-grown transplants, don’t go straight from inside to full sun. Spend a week gradually exposing them to outdoor conditions — an hour outside the first day, increasing each day. This is called hardening off, and skipping it causes transplant shock.
Planting Depth and Timing
Each plant has specific needs. Tomatoes can be buried deep (up to two-thirds of the stem); the buried portion sprouts roots and creates a stronger plant. Garlic cloves go in pointy-side up. Cucumbers dislike cold soil and shouldn’t go out until soil temperature is reliably above 60°F.
Pay attention to your local growing season. Planting too early in cold soil stalls plants and invites disease. Your local cooperative extension office publishes planting calendars specific to your region — they’re free and worth bookmarking.
Step 7: Water, Mulch, and Feed Your Garden
Getting your garden established is one thing. Keeping it healthy throughout the season is another.
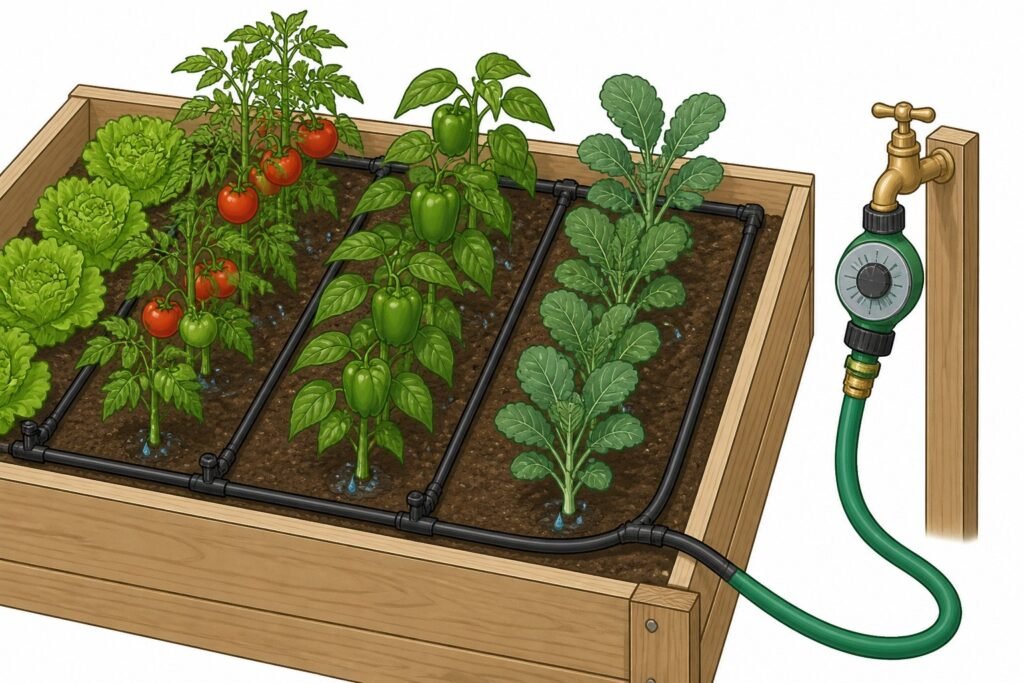
How to Water Your Garden
Inconsistent watering is the number one cause of garden problems — cracked tomatoes, bitter cucumbers, wilted seedlings. Aim for 1–1.5 inches of water per week, either from rain or irrigation.
Water deeply and infrequently rather than a little every day. Deep watering encourages roots to grow down, making plants more drought-resistant. Shallow daily watering produces shallow, weak roots.
A drip irrigation system or soaker hose delivers water directly to the root zone and keeps foliage dry, which reduces disease. Add a timer and your watering essentially runs itself.
Avoid watering with a garden hose from above in the evenings — wet leaves overnight are an invitation for fungal disease.
Mulch Your Garden Beds
Mulch is one of the most underrated tools in gardening. A 2–3 inch layer of straw, wood chips, or shredded leaves around your plants:
- Reduces weed germination significantly
- Retains soil moisture so you water less
- Moderates soil temperature
- Breaks down over time and feeds the soil
Apply mulch after planting, keeping it an inch or so away from plant stems to prevent rot.
Fertilizing
If you started with good compost-amended soil, your plants may not need extra fertilizer early on. As the season progresses, heavy feeders like tomatoes and cucumbers benefit from a monthly application of organic fertilizer or compost tea.
Avoid over-fertilizing with nitrogen — you’ll get lush leaves and weak fruit production. Look for fertilizers with a balanced NPK ratio, or one that’s slightly higher in phosphorus and potassium for fruiting crops.
Step 8: Manage Weeds and Common Garden Pests
No matter how good your garden design is, weeds and pests will show up. The key is catching them early.
Weed Early and Often
Weeds compete with your vegetables for water, space, and nutrients. A small weed pulled today is much easier than a large one pulled next week — and a large weed left another week will go to seed and give you hundreds more problems.
Weed when the soil is moist, right after watering or rain. Young weeds pull out cleanly; dry, hard soil makes it harder to get the roots.
That layer of mulch mentioned above? It suppresses a huge portion of weed seed germination. You’ll still get some weeds coming through, but far fewer.
Dealing With Common Garden Pests
Inspect your plants a few times a week. Most common garden pests — aphids, caterpillars, squash bugs — are manageable if you catch them early. Here’s a quick rundown:
- Aphids — knock them off with a strong stream of water or use insecticidal soap
- Caterpillars/hornworms — handpick them (yes, by hand); check the undersides of leaves
- Slugs — set out beer traps or diatomaceous earth around susceptible plants
- Squash vine borers — cover squash plants with row cover early in the season; once they’re in, they’re hard to control
For flying pests and birds, a lightweight net draped over beds protects plants without blocking sunlight or airflow. It’s especially useful for brassicas like cabbage and broccoli, which attract butterflies whose caterpillars will strip leaves bare.
A DIY garden pest strategy doesn’t need to be complicated: walk the beds regularly, identify what you’re seeing, and act quickly. Most problems don’t require pesticides if caught in the first few days.
Step 9: Harvest at the Right Time (and Keep Harvesting)
This is the most satisfying part — and also one where beginners leave food on the vine too long.
Most vegetables taste best and produce more when you harvest them young and regularly. Cucumbers left too long turn bitter and seedy. Zucchini left a few extra days turns into a baseball bat. Lettuce bolts (goes to flower and turns bitter) if you don’t cut it in time.
Check your plants every 1–2 days during peak season. When beans, cucumbers, and squash are picked consistently, the plant redirects energy to produce more fruit rather than developing seeds. More harvesting = more harvest.
Leafy greens can be harvested “cut and come again” — snip outer leaves and the plant continues growing from the center. A single lettuce plant can feed you for weeks this way.
Ready to Start Your Garden From Scratch?
Starting a garden doesn’t require perfect conditions, a big yard, or a lot of money. It requires starting. Pick your location, build or prepare one or two beds, put good soil in them, and plant things that excite you to grow.
You’ll make mistakes your first season. Every gardener does — plants that bolt early, pests you didn’t see coming, tomatoes that crack after an inconsistent watering week. That’s not failure. That’s learning how to start a garden, and it’s how every good gardener got good at it.
Start small, pay attention, and build from there. Your second season will be noticeably better than your first. Your third season will make your neighbors jealous.
Go get your hands dirty.